Inkjet Printing Guide
STEP 5
Print Settings in Photoshop When Using Roll Paper
Print Settings in Photoshop When Using Roll Paper
Creating a Custom Size for Roll Paper
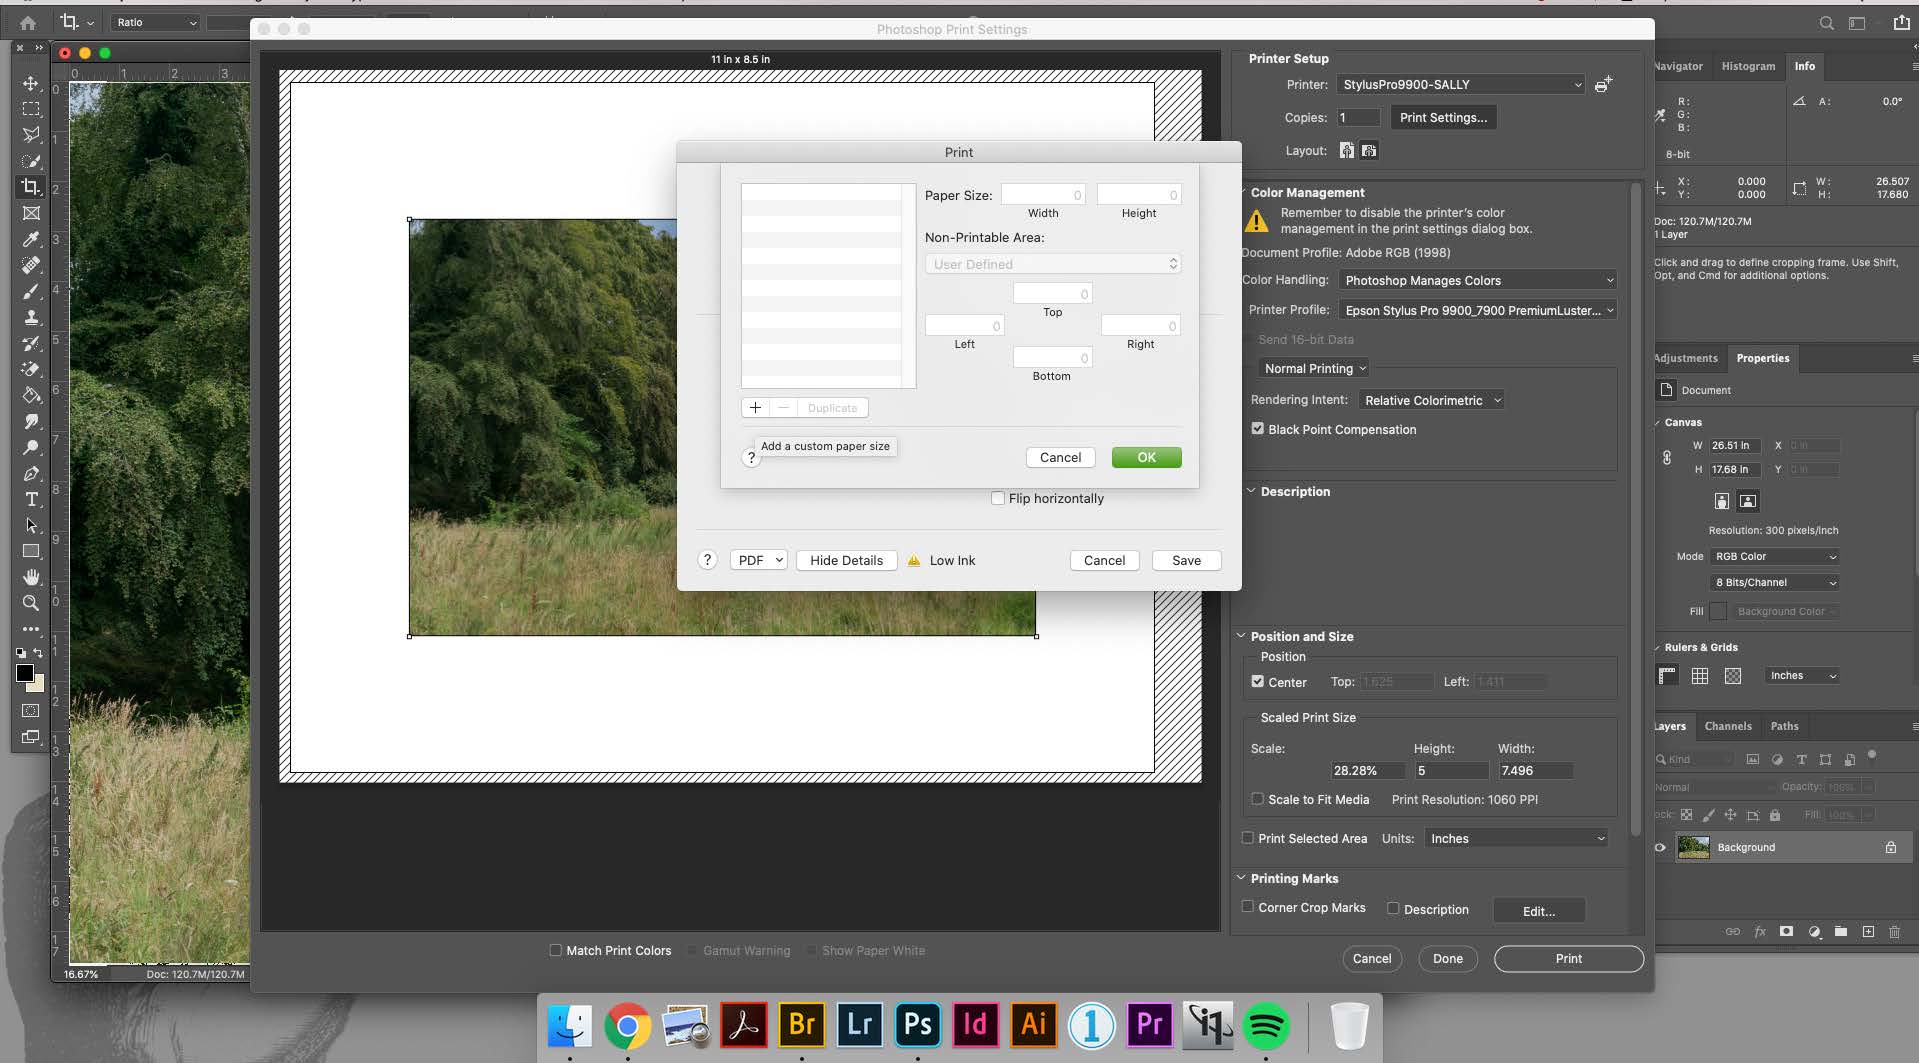
When you click on Manage Custom Sizes this will bring up another window.
See the image below.
For ROLL PAPER you will always need to create your own size for your paper
as the size depends on how big or small you wish to print.
![]()
To create your CUSTOM SIZE click on the + ICON.
This will then create a new size in the left side list you may name it whatever you would like.
Here it is just listed as Untitled.
Like in the image below.
![]()
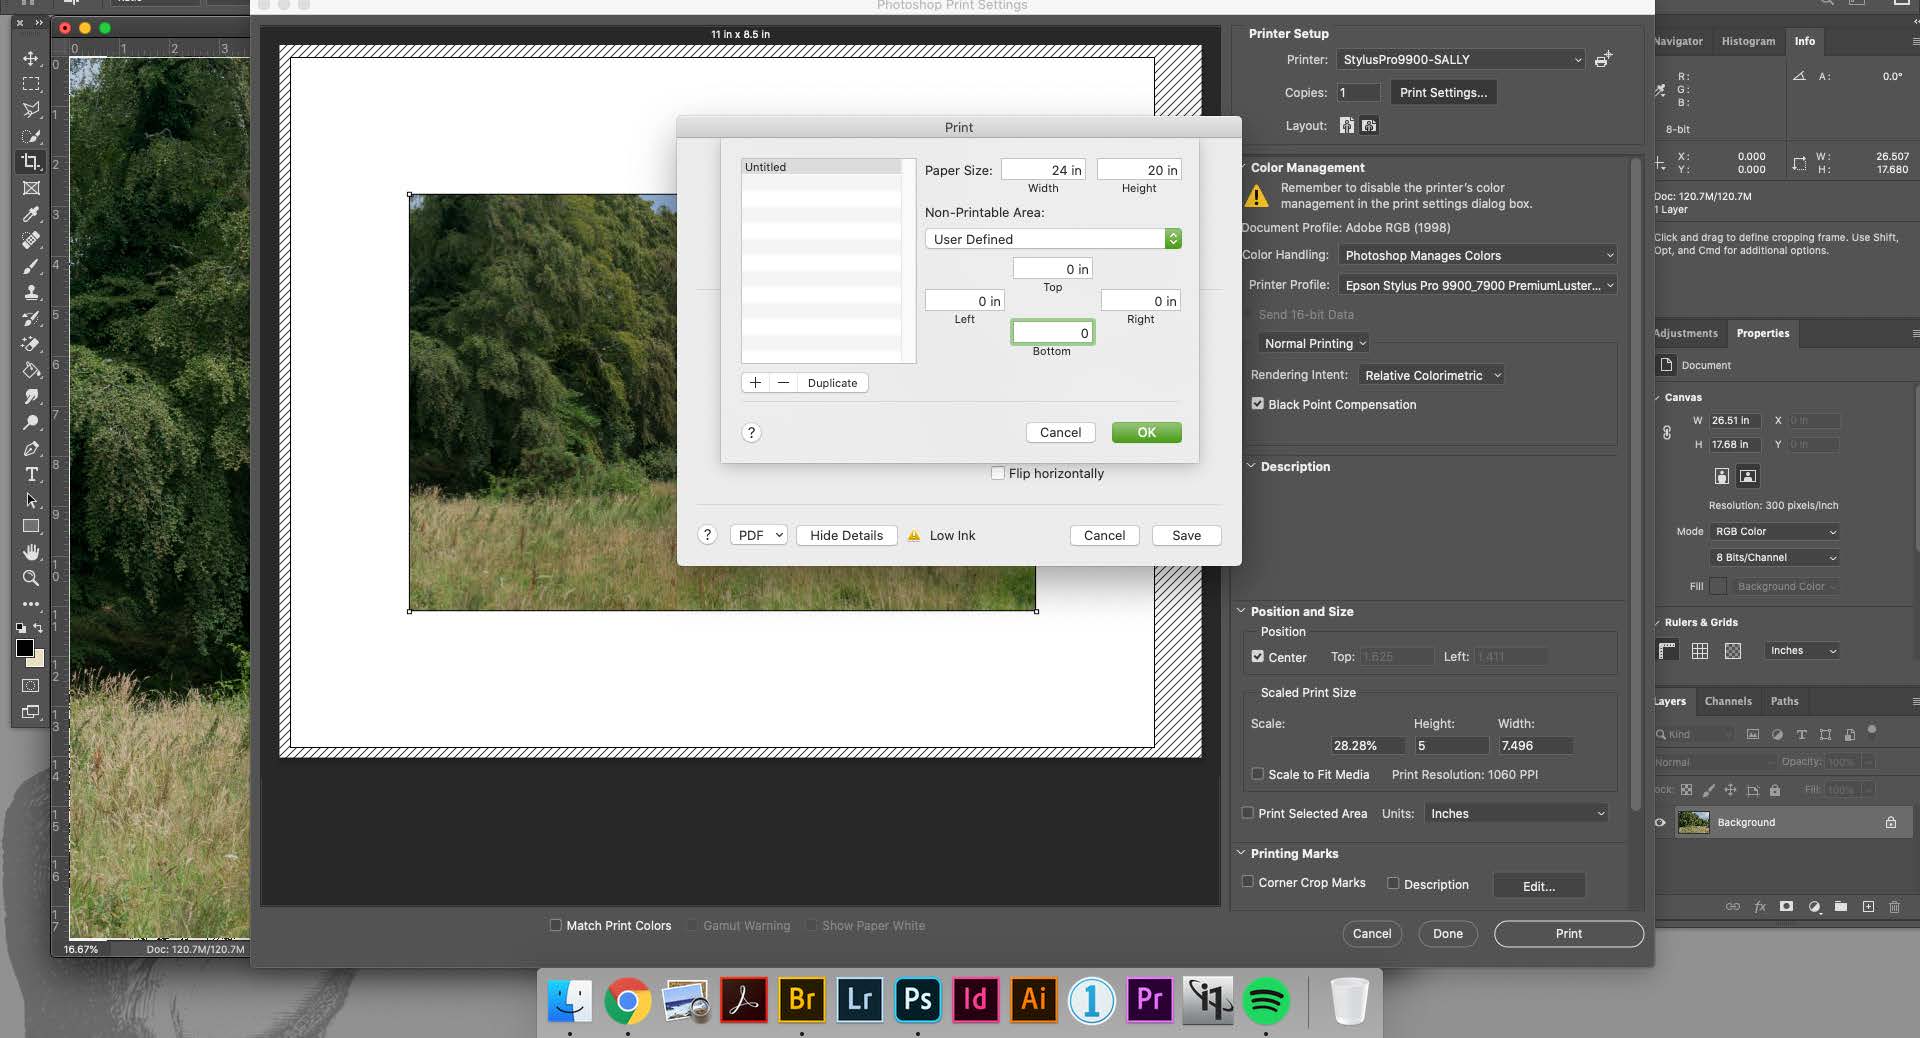
Then you will fill in the DIMENSIONS of your print in the WIDTH and HEIGHT.
For the WIDTH you will always type the WIDTH of your ROLL PAPER.
In the image above our WIDTH is 24 inches
(because for this example we have a 24 inch roll of paper).
Never place the WIDTH of your ROLL PAPER in the HEIGHT.
This will cause the printer to have an error and may waste your paper.
For the HEIGHT you will then type the size of the Print you would like to make.
In the image above our HEIGHT is 20 inches.
Your HEIGHT can be no smaller than 5 inches and no larger than 100 inches.
You will then make sure that where it says Left, Right, Top and Bottom are all set to ZERO INCHES.
Once you do that press OK and select your new CUSTOM SIZE from the Paper Size drop down menu.
NEXT PAGE
PREVIVOUS PAGE
INDEX PAGE
When you click on Manage Custom Sizes this will bring up another window.
See the image below.
For ROLL PAPER you will always need to create your own size for your paper
as the size depends on how big or small you wish to print.
To create your CUSTOM SIZE click on the + ICON.
This will then create a new size in the left side list you may name it whatever you would like.
Here it is just listed as Untitled.
Like in the image below.
Then you will fill in the DIMENSIONS of your print in the WIDTH and HEIGHT.
For the WIDTH you will always type the WIDTH of your ROLL PAPER.
In the image above our WIDTH is 24 inches
(because for this example we have a 24 inch roll of paper).
Never place the WIDTH of your ROLL PAPER in the HEIGHT.
This will cause the printer to have an error and may waste your paper.
For the HEIGHT you will then type the size of the Print you would like to make.
In the image above our HEIGHT is 20 inches.
Your HEIGHT can be no smaller than 5 inches and no larger than 100 inches.
You will then make sure that where it says Left, Right, Top and Bottom are all set to ZERO INCHES.
Once you do that press OK and select your new CUSTOM SIZE from the Paper Size drop down menu.
NEXT PAGE
PREVIVOUS PAGE
INDEX PAGE