Inkjet Printing Guide
STEPS FOR BLACK AND WHITE PRINTING
Step 1
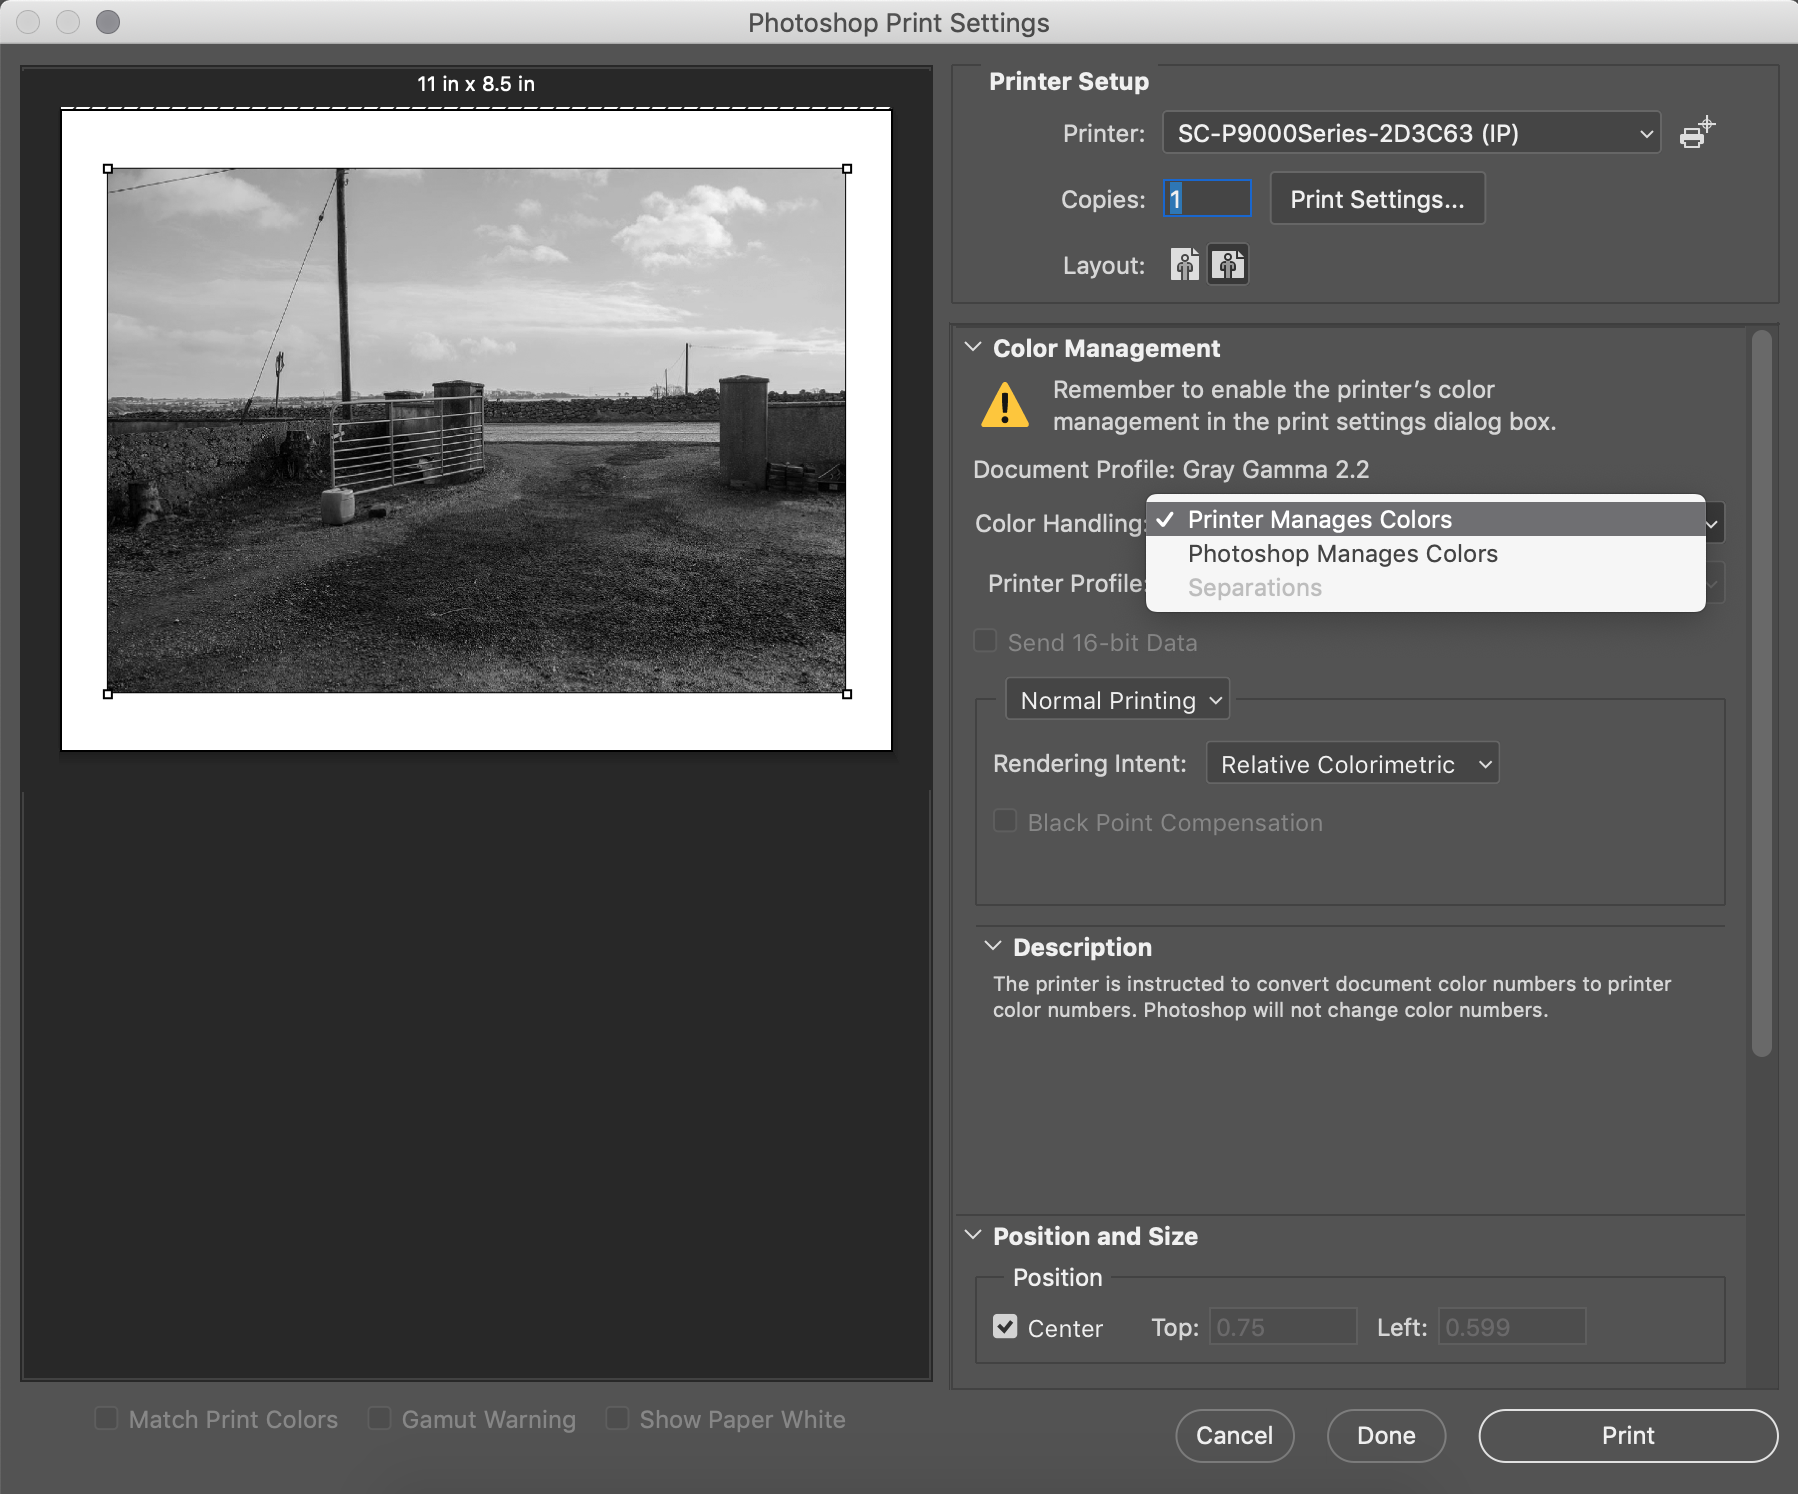
When printing a black and white image, choose PRINTER MANAGES COLOR instead of PHOTOSHOP MANAGES COLOR. This is because, unlike when printing a color image, the Epson driver is better at handling the rendering of a black and white image.
Step 2
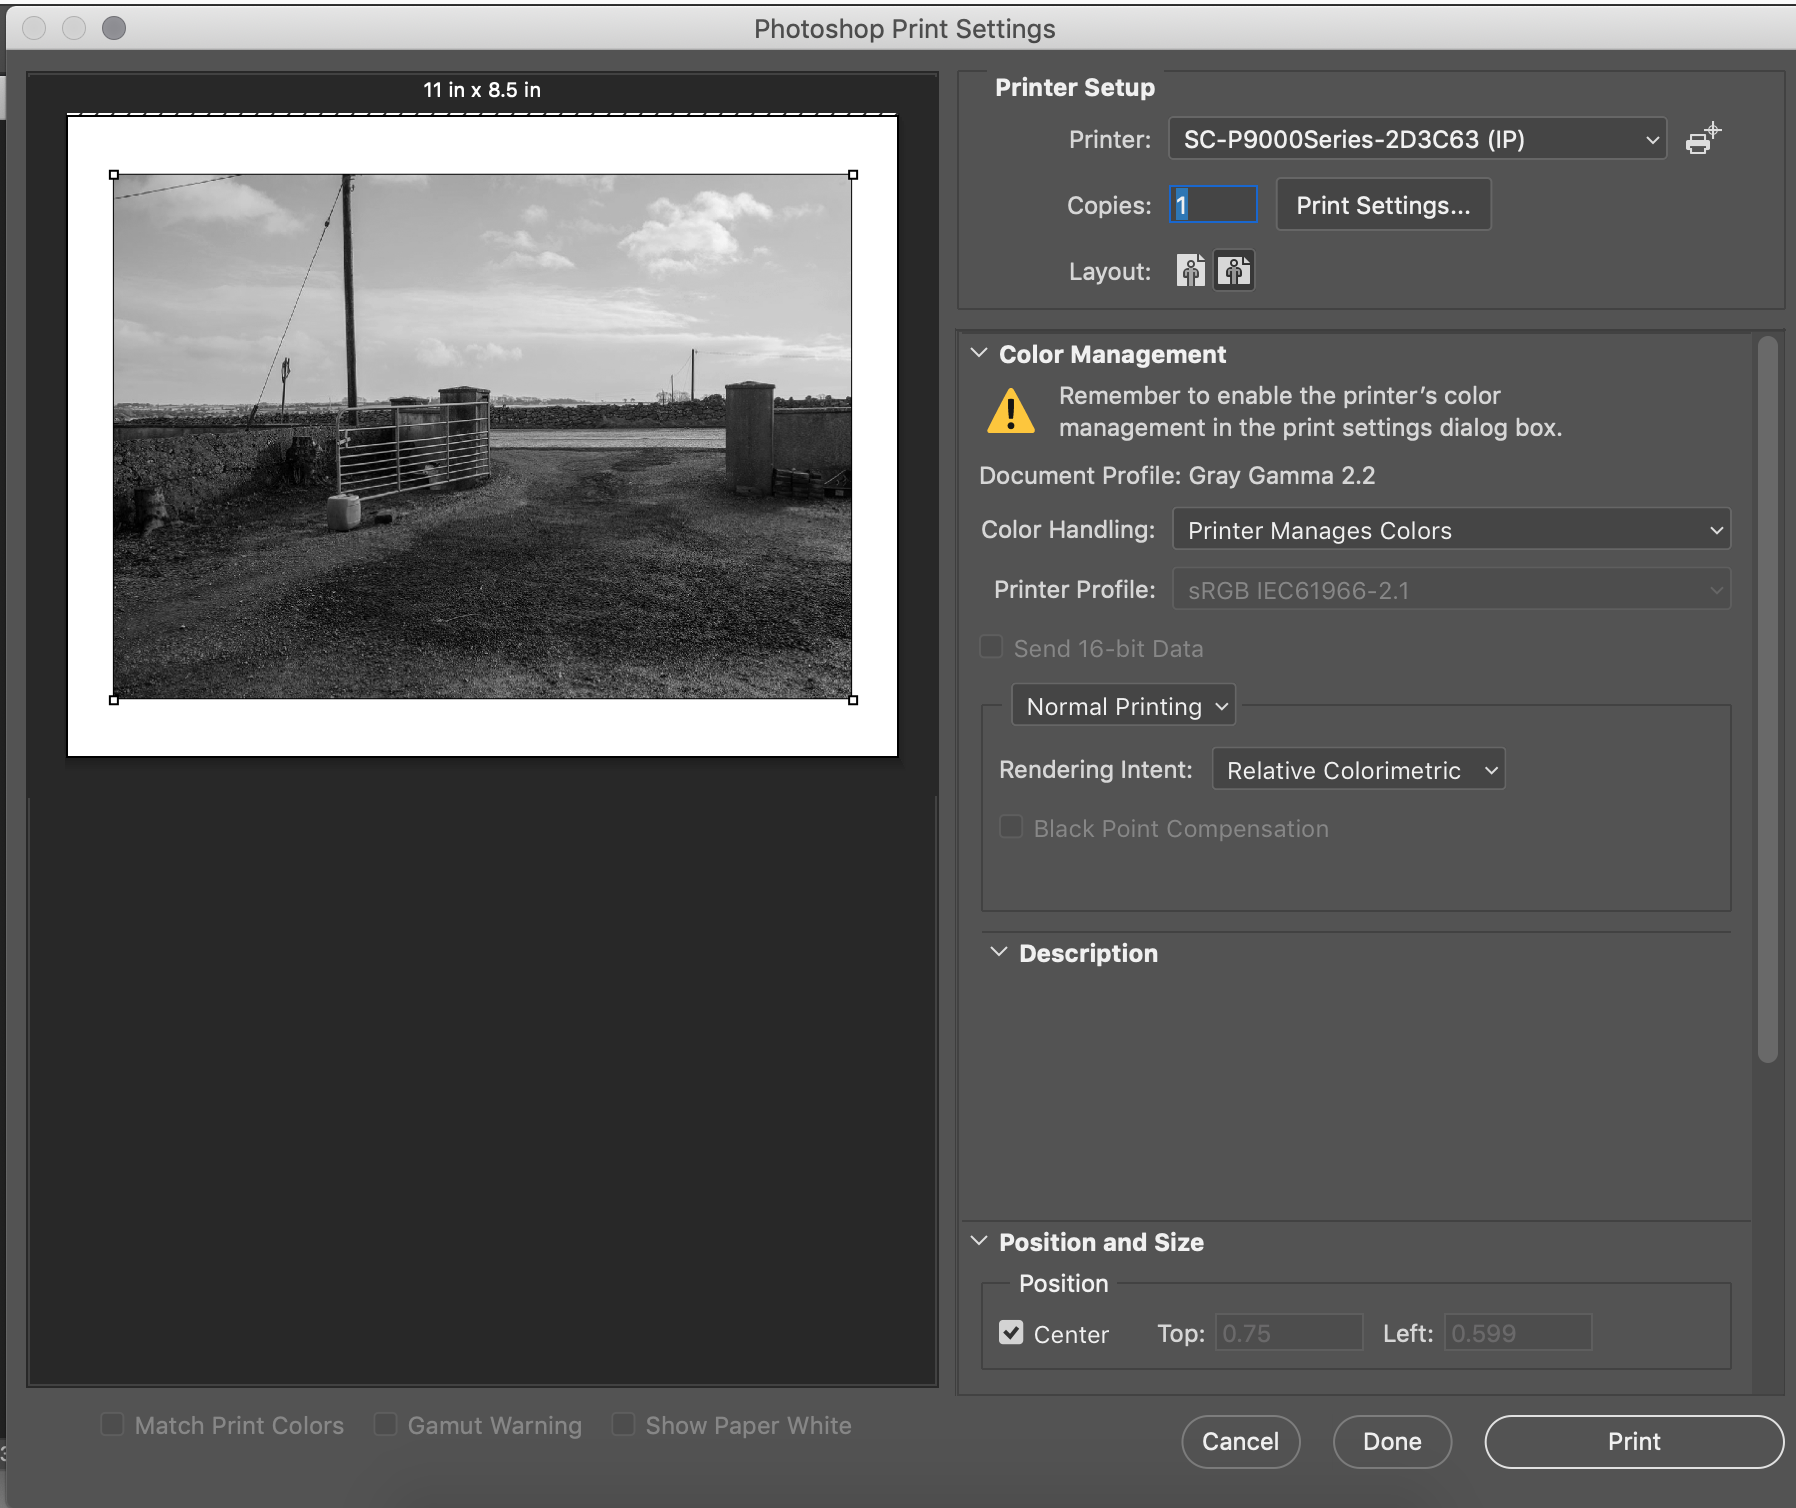
We also do not choose an ICC Profile.
We will set all these setting in the EPSON PRITNER SETTINGS WINDOW.
STEP 3
After selecting PRINTER MANAGES COLORS.
We will then click the PRINTER SETTINGS button under the printers name.
This will open the EPSON PRINTER SETTINGS WINDOW.
STEP 4
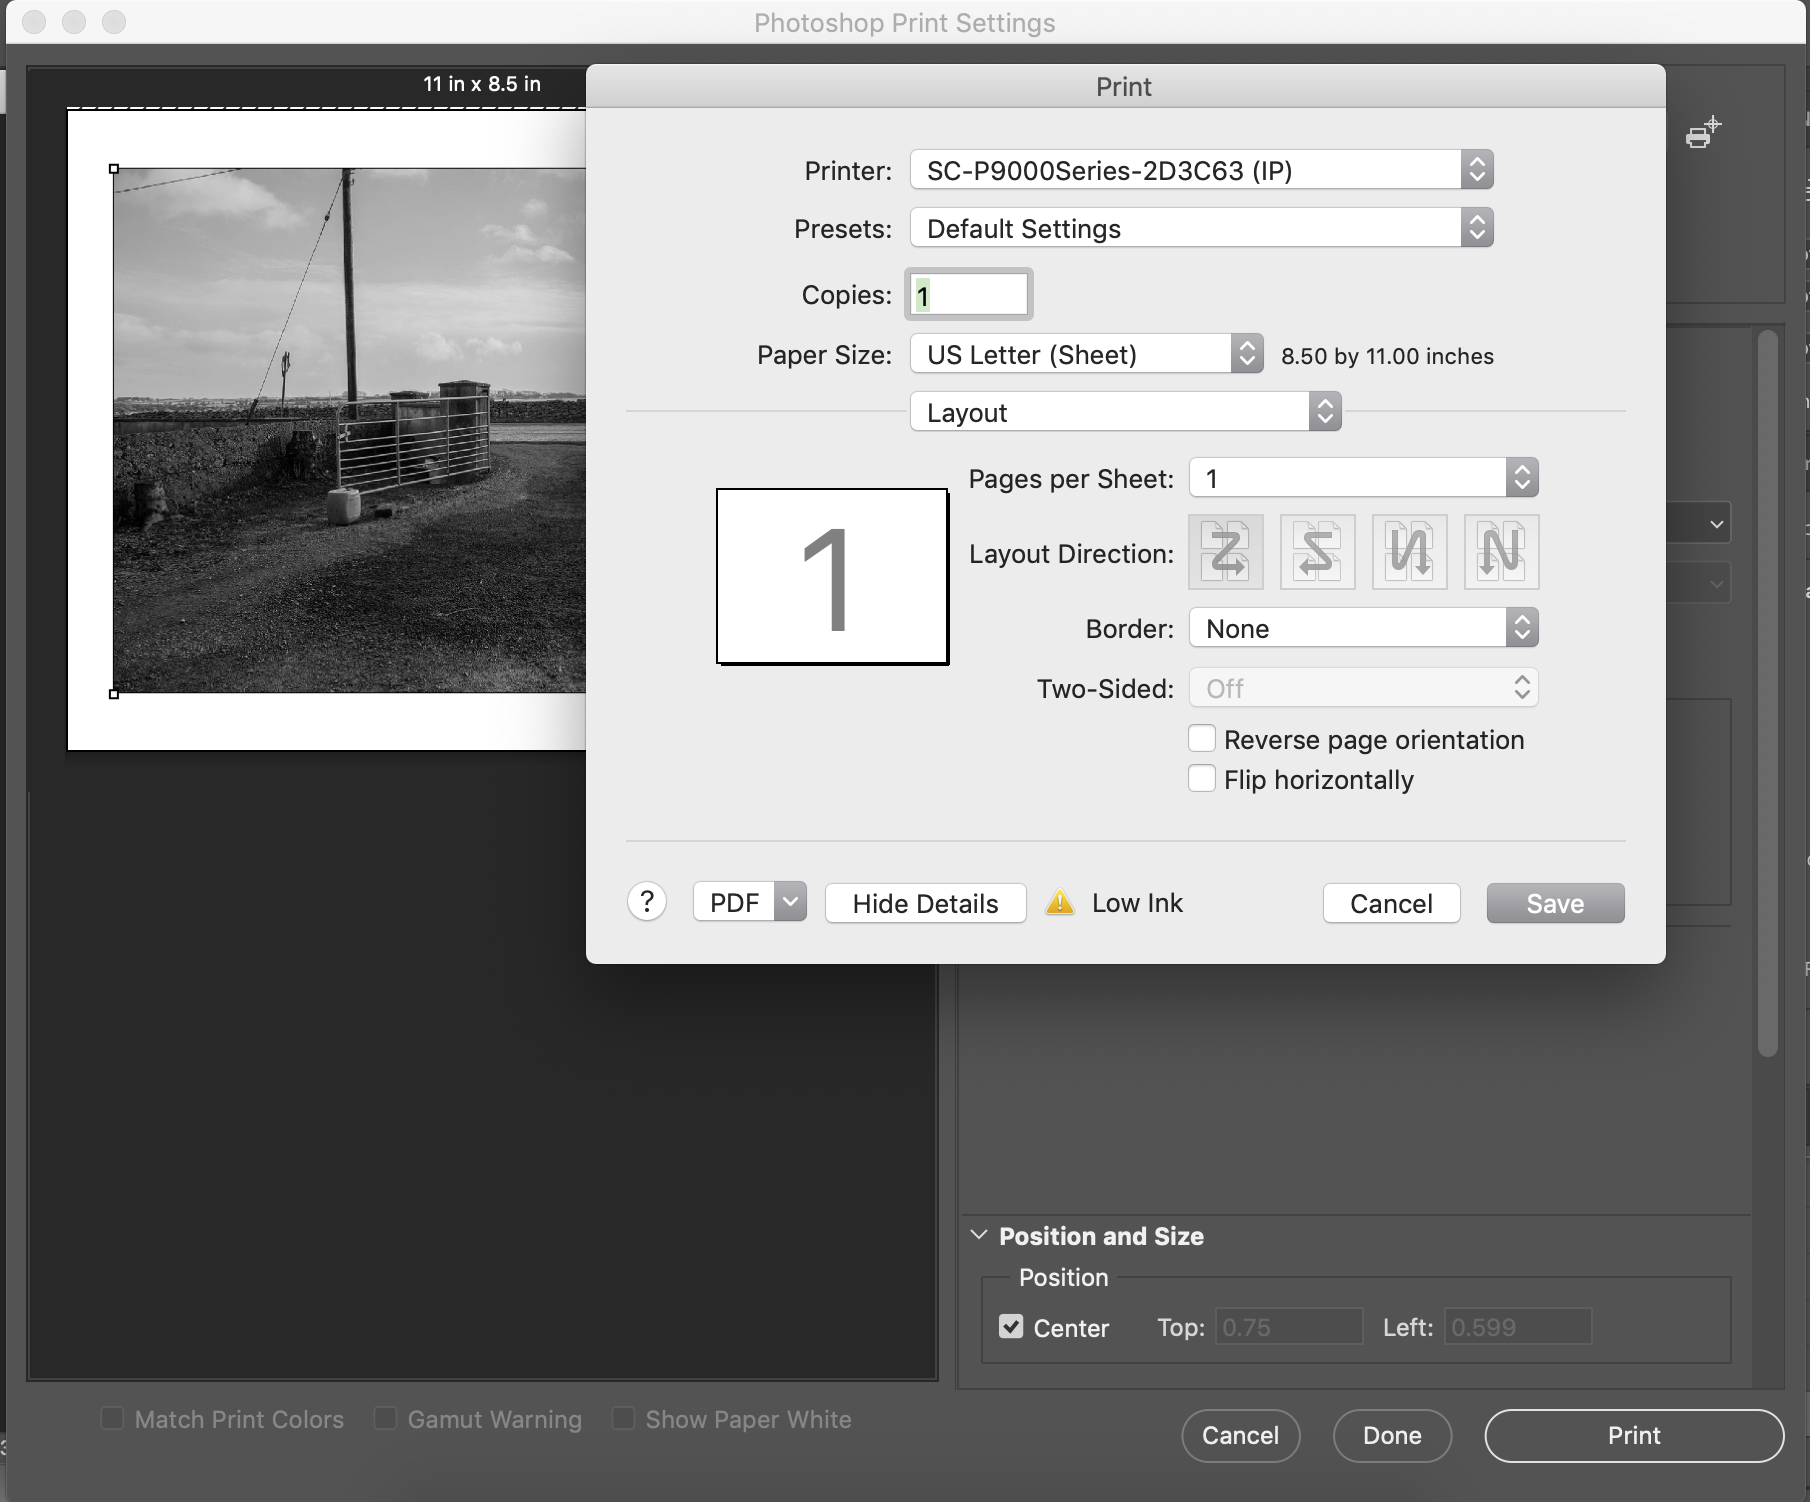
In the EPSON PRINTER SETTINGS WINDOW.
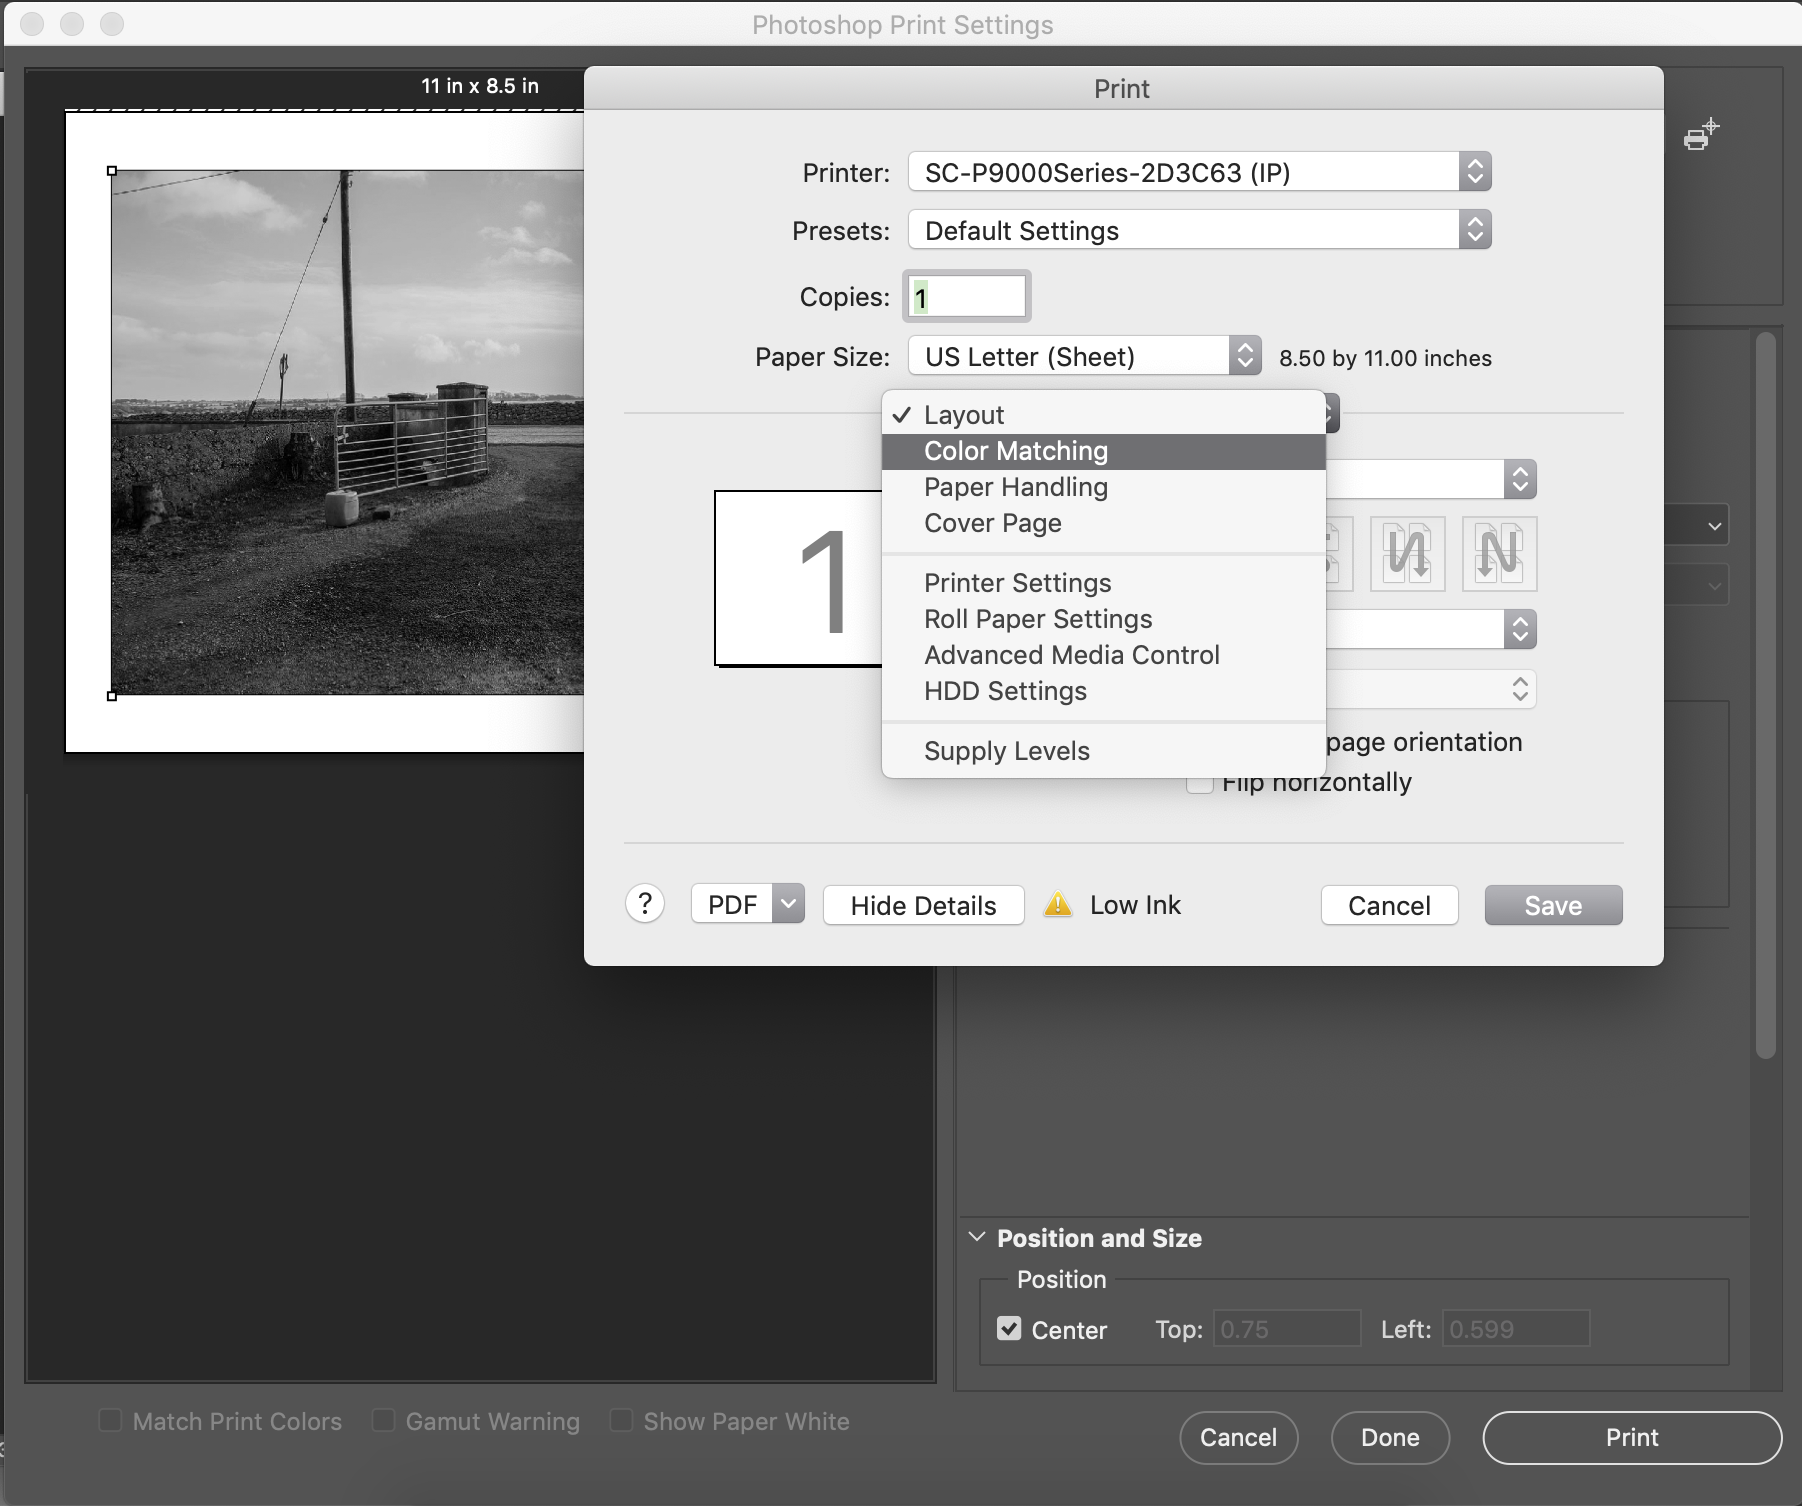
Find the third drop down menu from the top where it says LAYOUT.
In that menu navigate to where it says COLOR MATCHING and select that option.
STEP 5
The EPSON PRINTER SETTINGS WINDOW will then change to look like above.
On default it will have ColorSync selected.
You will switch it to EPSON COLOR CONTROLS by clicking on the circle next to it.
Next return back to the third dropdown menu and select Printer Settings.

STEP 6
The EPSON PRINTER SETTINGS WINDOW will then change to look like above.
On default it will have ColorSync selected.
You will switch it to EPSON COLOR CONTROLS by clicking on the circle next to it.
Next return back to the third dropdown menu and select Printer Settings.
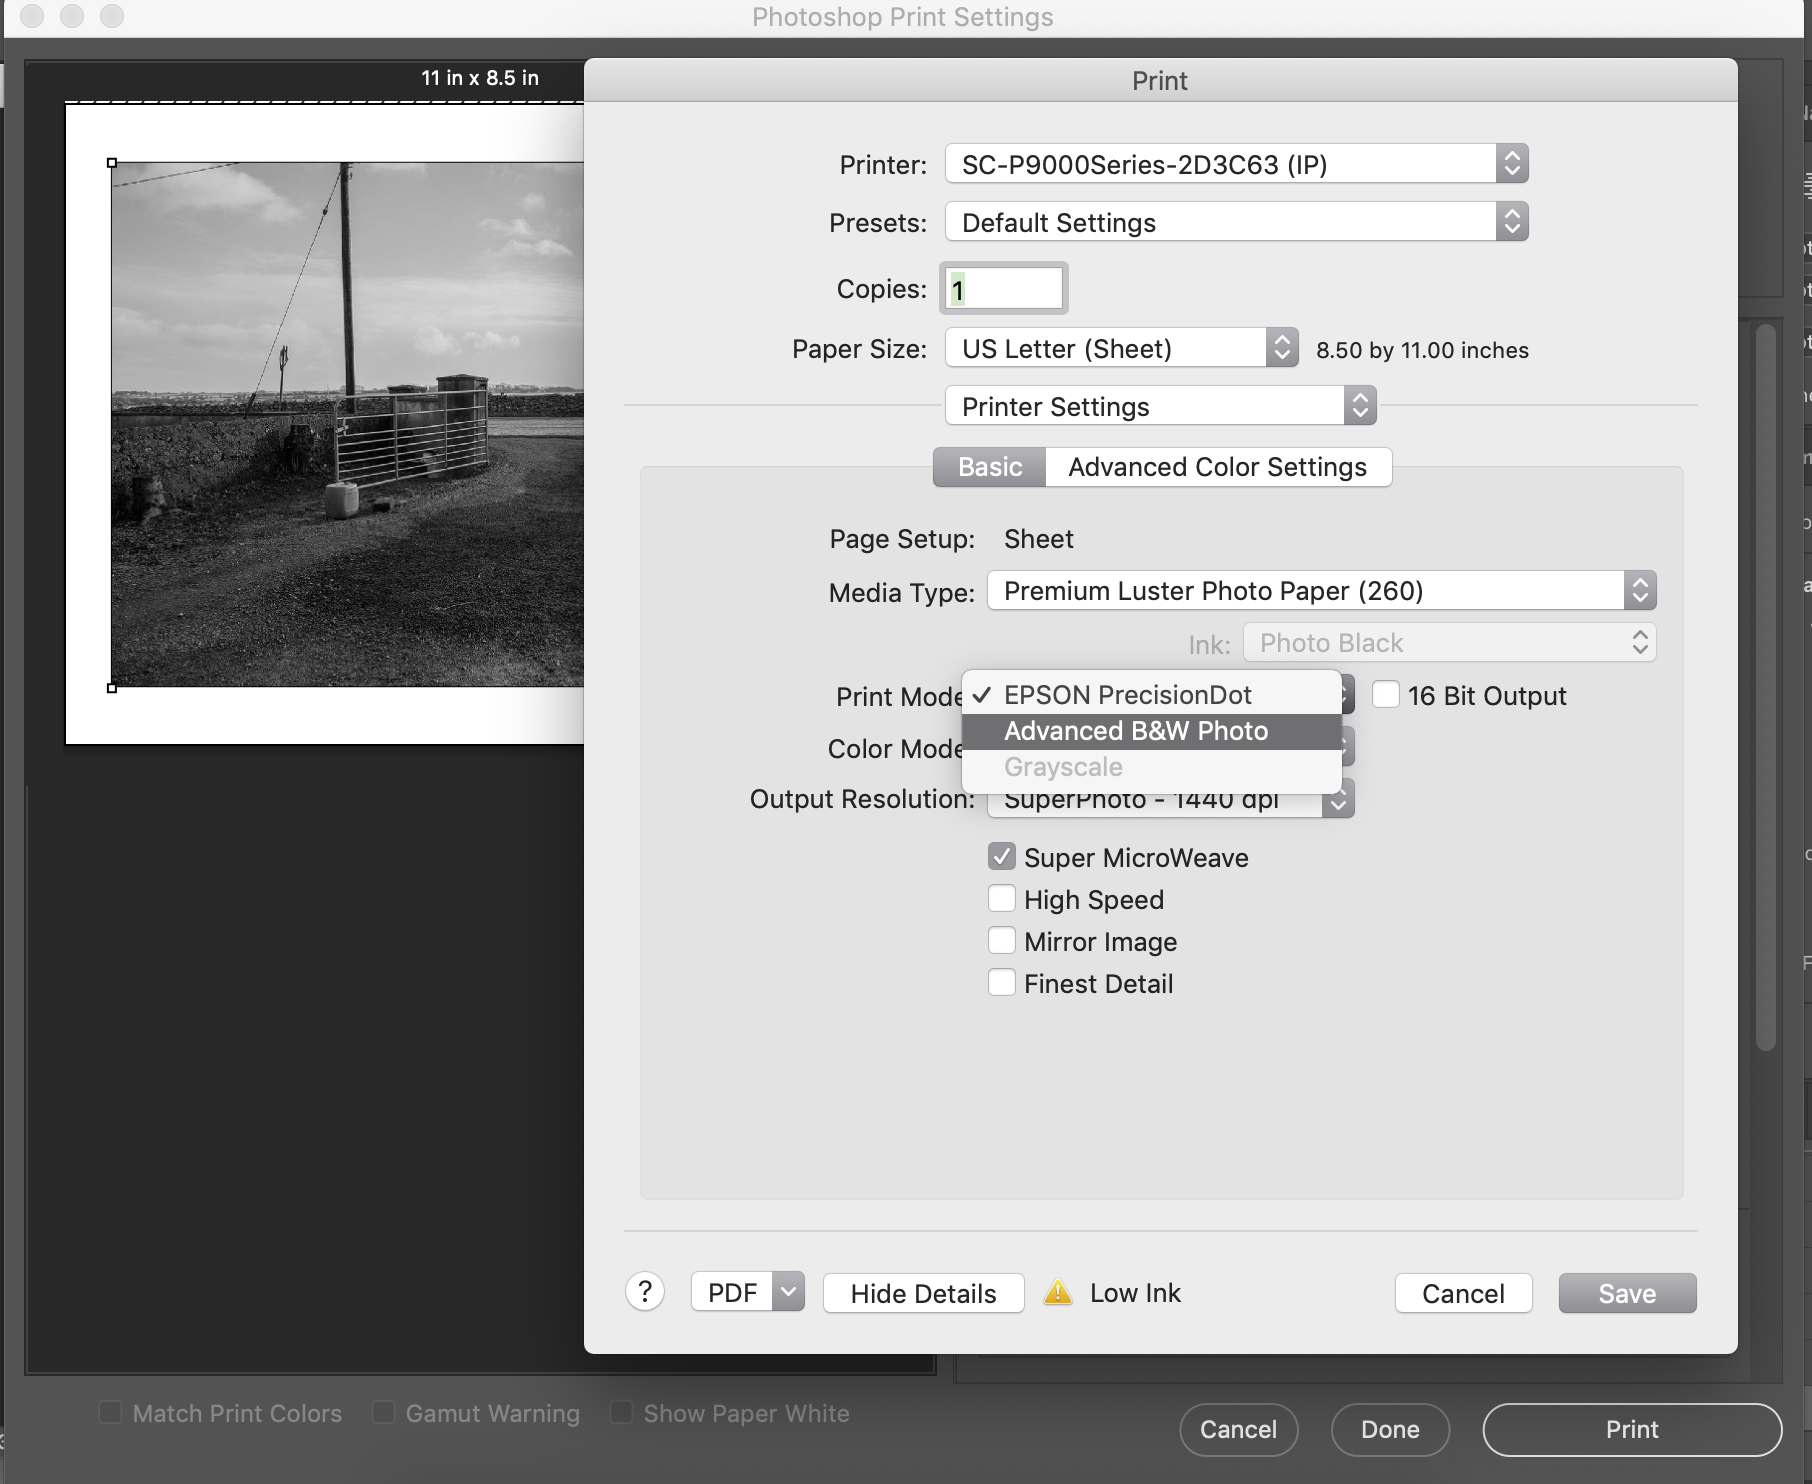
Step 7
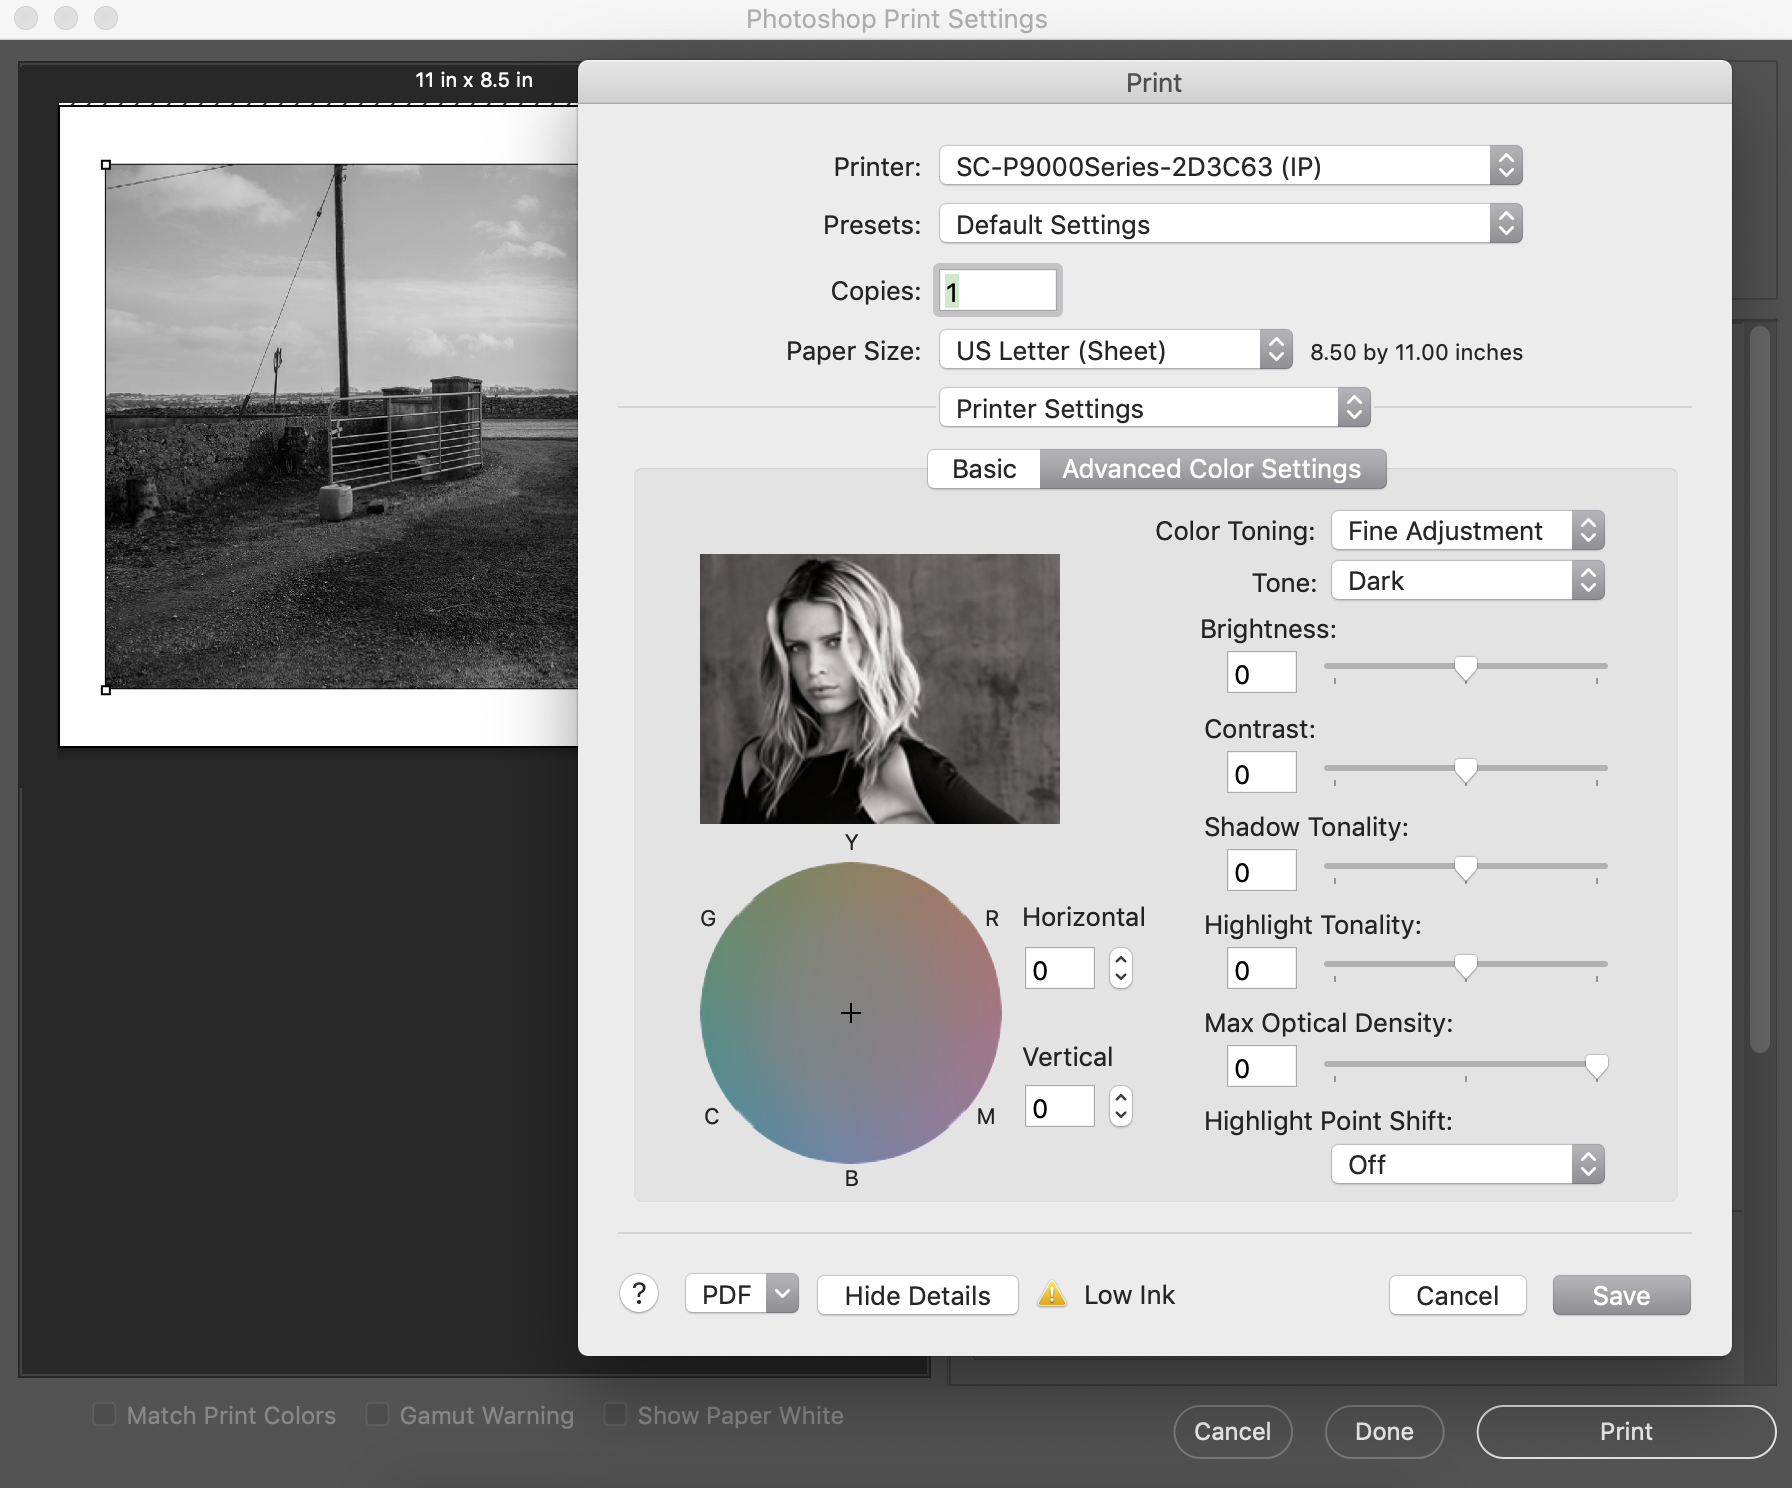
Once you have selected ADVANCED B&W PHOTO navigate to where the window says ADVANCED COLOR SETTINGS
Click on it. The window will then change to look like above.
Navigate to where it says TONE
By default it is on DARKER. Switch this to DARK.
Once you do this you can click SAVE and then press PRINT.
INDEX PAGE